

Even if you closely follow our mixing guide, the vocal sound can make or break your song. Since the human voice is an incredibly complex instrument, there’s a lot to get your head around when mixing vocals.
So today, we will show you ten tips to supercharge your vocal mixing process and get professional-quality results.
Vocal Mixing Tips
Vocals are often the most prominent part of a song. How well you mix your vocals will determine the quality of the entire mix.
Follow our vocal mixing tutorial to get the great-sounding vocals your mix deserves.
1. Use editing and vocal comping before mixing vocals
Mixing vocals is a complex task that includes editing, EQing, compression, saturation, and other mixing techniques. However, you should consider the order in which you apply these techniques to achieve the optimal mixing process.
What comes first when mixing vocals?
Before mixing, use vocal comping to find and combine the best vocal takes.
Once you’re happy with the comped vocal, edit all the unnecessary parts of the vocal recording. Any noises, breaths, and other non-essential parts of the vocal track will become more audible after you apply EQ and compression to the vocal.
So, edit your vocals to perfection and make them sound as good as possible before mixing.
What is vocal comping?
Vocal comping is the technique of compiling the best parts of multiple takes into one “perfect vocal” recording.
The vocal takes are typically aligned vertically in the DAW and played individually to identify the best vocal parts. The trim tool is then used to isolate the good part of the vocal from the rest of the track.
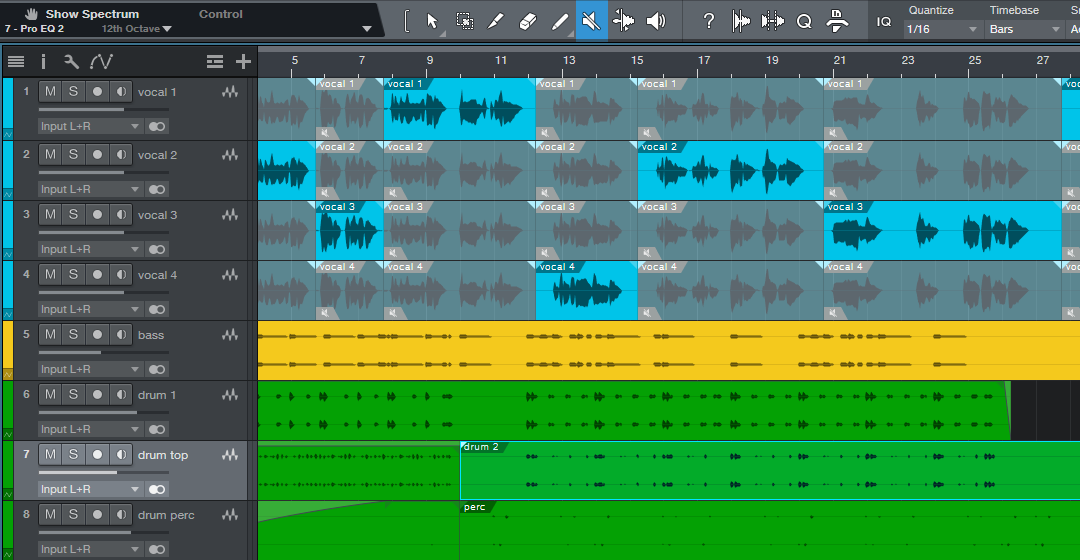
Use comping to combine the best parts of the performance before mixing vocals.
The best parts of multiple takes are combined and consolidated into a single vocal track.
2. Mix the lead vocal in context
When mixing vocals, it’s crucial to keep the rest of the song in mind. You should spend most of your time mixing the vocal track while the entire mix is playing, allowing you to see the bigger picture.
Spending a lot of time mixing soloed vocals is often counterproductive. It’s like choosing a tie without taking the rest of your outfit into account. You could select a tie that looks fantastic on its own, but when paired with the rest of your ensemble, it might look ridiculous.
Similarly, mixing vocals in isolation may result in a great vocal sound, but when placed in the context of the entire music production, it may not fit well or sound balanced.
Of course, it’s acceptable to solo the vocal when using EQ to remove specific resonant frequencies surgically. In most other cases, it’s best to treat the vocals in the context of the entire mix.
3. Use volume automation on vocals before compression
One key trick when editing and mixing vocals is volume automation. Automate your vocals to achieve natural-sounding gain reduction even before you compress the signal.
Your vocalist will naturally vary the intensity of the vocal throughout the phrases, resulting in uneven volume. Leaving those volume inconsistencies untreated does not present the vocal part in the best light.
Thankfully, volume automation can help you normalize the volume and result in a lead vocal that sounds consistent.
To get started, listen carefully to each phrase and identify words that are notably softer or louder than the other vocal sections. Use your DAW’s insert marker feature to highlight those sections of your vocal performance.
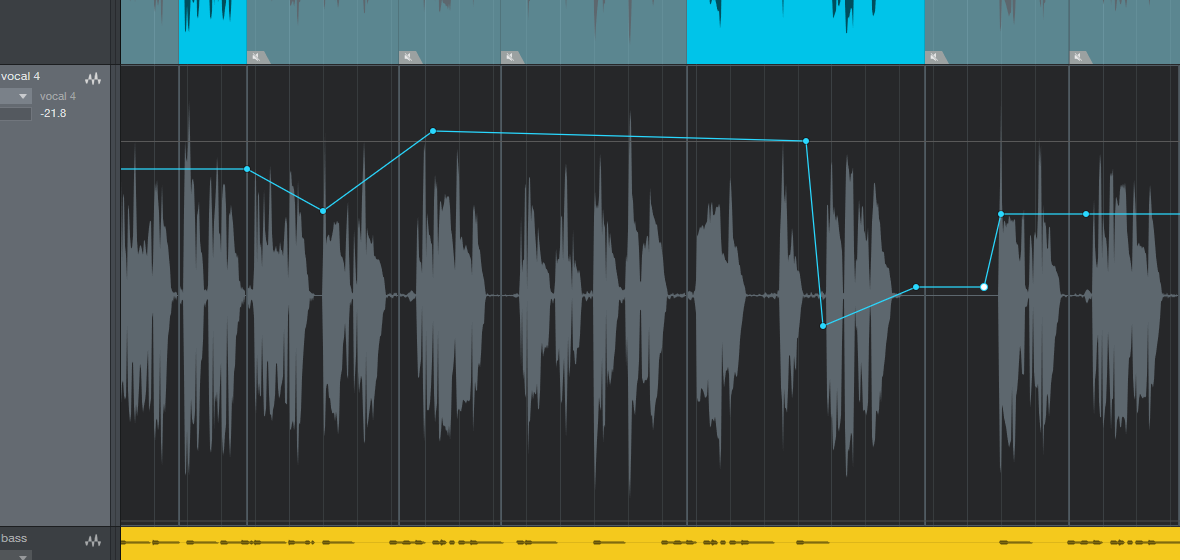
Use automation to level the vocal before it hits the compressor.
Once the problem areas are identified, automate the volume to boost the silent vocal parts.
You may be thinking that the compressor will deal with this. However, if you rely solely on the compressor, you’ll have to pump the comp harder than you otherwise would.
This may result in compression artifacts that negatively impact the quality of your mix.
So, use volume automation as the primary tool for leveling vocals, and use compression as a more gentle gain reduction effect to bring out the finer details in a vocal recording.
A plugin like Waves Vocal Rider can help you save time by controlling the volume of the vocals for you.
4. Saturation is an often-forgotten vocal mixing technique
One of the best tools for mixing vocals is saturation, but this secret sauce isn’t always considered a must-have on the vocal channel.
What does saturation do to vocals?
In the analog days, vocal recordings would get a subtle saturation treatment from the microphone preamps, console preamps, and analog tape.
However, in the age of audio interfaces and digital audio workstations, our vocal recordings are cleaner than ever before, at the cost of sounding completely sterile.
Saturation squeezes a vocal a bit like compression, but it shines when used to fatten up a vocal and add presence without making it too spiky.
Use saturation lightly to achieve this outcome, or boost the saturation intensity for a more prominent effect.
Should you use tape or tube saturation on vocals?
Generally speaking, use tape saturation to gently level the volume of your vocals. Tube saturation is more suitable for vocal distortion.
You can make vocals sound aggressive and larger-than-life with saturation, especially when combined with other effects like reverb and delay. You can use striking vocal effects like this to make certain song sections stand out.
When using saturation as an effect, try sending it to an aux channel. You can then blend in the aux channel to taste to get the desired effect while retaining the core sound of your original vocal mix.
Using parallel processing when mixing vocals can result in subtle saturation that adds color and presence that brings out the character of your vocals.
Alternatively, distortion can be used for all the above applications as a more aggressive effect that can drastically change the vocal mix.
So, saturate your vocals to add character and make them cut through the mix. Free saturation plugins like FerricTDS mkII and BPB Saturator are great tools to make your vocals stand out.
5. Best EQ settings for vocals: cut the lows and sculpt the rest
The first step to EQing vocals is to roll off or low-cut the bass frequencies. The low frequencies contribute nothing to a vocal except unwanted noise that clashes with the bass instruments.
What are the best EQ settings for vocals?
You’ll typically want to cut the bass frequencies under 80 Hz for male and around 100 Hz for female vocals.
After that, you may want to sculpt the vocal at around 100 to 300 Hz, which is where the fullness of the vocal is. This area of the frequency spectrum may also contain boominess, so use an EQ to gently cut the mud without making the vocals sound thin.
This is particularly important for dense mixes or when numerous vocal tracks play simultaneously.
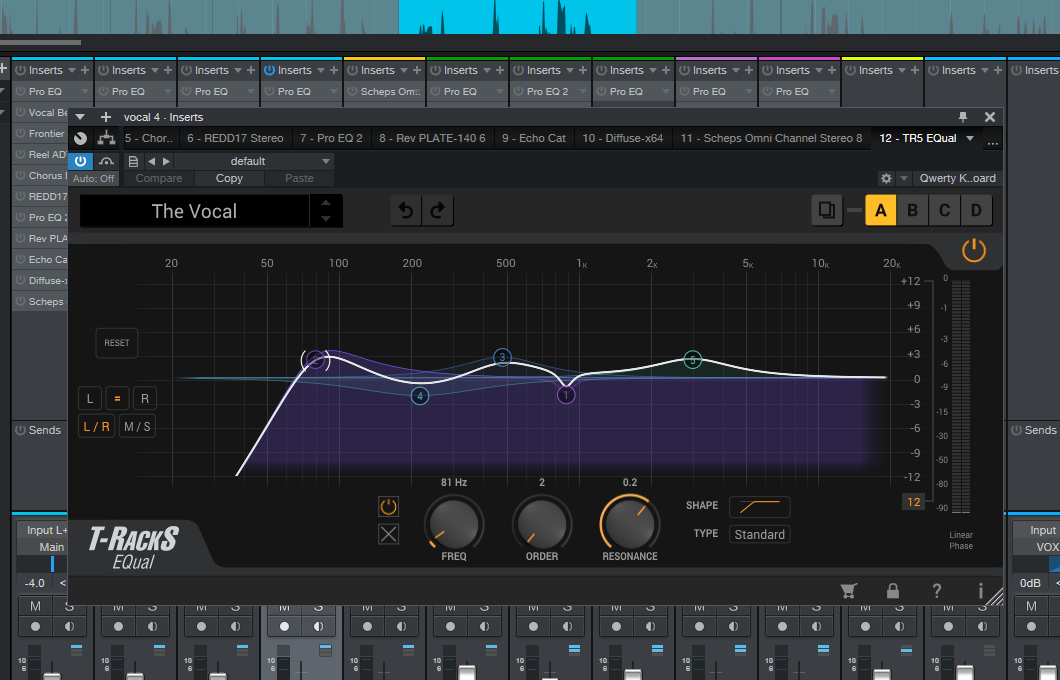
A typical vocal EQ with a low-end roll-off and gentle sculpting in the mids.
Use a wide cut within this range to tighten up and cut out any boominess if required. Subtle is key, though. You’ll typically want to work within a 6 dB cut.
For the rest of the frequency spectrum, use the list below as a rough EQ guide for vocals. Note that female vocals may be a bit higher for each point.
- 80 Hz and below: Cut this unnecessary low end content;
- 100-300 Hz: Main vocal frequencies. You may find boominess here;
- 350-500 Hz: Cut here to reduce boxiness;
- 1-2 kHz. Cut here if honky. An important area for presence;
- 3-4 kHz: Cut here if nasal. Also important for presence;
- 7-10 kHz: Sibilance. Consider using a plugin to treat problematic frequencies;
- 10+ kHz: Air and sparkle. Apply a gentle boost to make the vocals sound airier.
Every vocal is different, so always use your ears when applying the vocal EQ. Also, remember to be careful when using additive EQ to emphasize certain frequencies in the vocal. A gentle EQ boost goes a long way!
A dynamic EQ like TDR Nova can help you get more control over the signal. For example, you can use it to only EQ the loudest parts of the recording.
6. Use a de-esser for a great vocal sound
One of the best tools for mixing vocals is a de-esser. De-essing is the process of reducing loud sibilance (s’s, t’s, etc.) and other high-frequency vocal noise from performances.
The first step is to set up your recording session in a way that stops the most egregious of unwanted vocal noises. Consider using a pop filter, optimal mic angles, and distance from the microphone to prevent sibilance and plosives (loud p, d, b, t, and k noises)
After that, if unwanted noises still find their way into your vocal recording, you can address them in your DAW. This can be achieved by using a de-essing plugin.
What is a vocal de-esser?
A de-esser is an audio compressor that is fine-tuned to reduce sibilance and other harsh frequencies from a vocal.
Most vocal de-essers let you choose a target frequency and the plugin’s sensitivity to sibilance. You can then apply the desired de-essing amount to clean up the vocals.
How to use de-essing on vocals?
To properly de-ess a vocal recording, select the target frequency and gently increase the processing amount. Carefully listen to your vocal while pushing the de-esser.
You should remove the harsh vocal frequencies without introducing a lisp. Our advice is to increase the de-essing amount right until you can hear a slight lisp, and then decrease the intensity by roughly five percent.

Techivation offers an excellent freeware de-esser.
Another useful technique is to put the de-essing plugin after anything in the vocal chain that might increase sibilances, such as EQ or compression.
The free T-De-Esser Plus plugin by Techivation is a great plugin for mixing vocals.
Consider manual de-essing for greater control.
An alternative approach is to edit the unwanted noise out manually. You can achieve this by finding the unwanted noises, slicing out the relevant section, and reducing the volume of the short clip with the unwanted noise or by writing level automation.
A manual approach has the advantage of getting a more natural-sounding vocal than a plugin, which may not correctly cut all the unwanted noise or may cut out sounds you want to keep in.
Manual de-essing might seem like a lot of work, but once you get the hang of it, you can do it fairly quickly. Both approaches can work with enough tweaking, though.
7. Use a compressor (or two) to tighten your lead vocal
Compression is one of the crucial music production techniques, and the human voice is one of the most dynamic and expressive instruments. A compressor will tighten your vocal and make it stand out.
As a general rule of thumb, start with a medium attack time and set the threshold to the desired value. Adjust the attack fader until you can barely hear the compressor working.

Xtressor Nuke is a great-sounding freeware compressor.
Using multiple compressors on the vocal can produce a more natural-sounding result. The first compressor should catch the volume peaks and the transient of the vocal, while the secondary compressor applies gentle leveling to the entire track.
Free compressor plugins like Xtressor NUKE and BPB Dirty LA are easy to operate, even for beginners.
8. Reverb and delay plugins add dimension to vocals
Vocals that lack dimension and depth won’t sit well within the mix. A proper sense of space is required to fit your vocal in a busy mix. That’s why delay and reverb plugins are essential to the vocal mixing chain.
Vocals need at least some reverb to sound professional. A dry vocal track is typically sent to at least two reverb channels simultaneously to get the best results.
However, reverb is easily overdone. The trick is to keep the vocal in focus while still providing enough reverb to enhance the tone of the vocal.
The pro tip here is to listen to your mix with and without reverb to try and fine-tune the perfect amount. You want the vocal to be wet but not so much that it loses focus.
To add contrast, use generous amounts of reverb on the backing vocals to push them further back in the mix.
9. Use double-tracking and harmonies on your vocals properly
One of the easy ways to achieve a professional sound is by adding vocal layers. Consider adding harmonies, backing vocals, and double-tracking to make your vocals sound larger than life.
What is vocal double-tracking?
Vocal double-tracking is recording the same part twice and layer it to achieve a fuller sound.
However, don’t just add extra vocal layers for the sake of it. Really think about what you want to achieve by adding extra vocal layers and what it adds to the song.
Sometimes the intimacy of a single vocal part is more powerful than adding several layers.
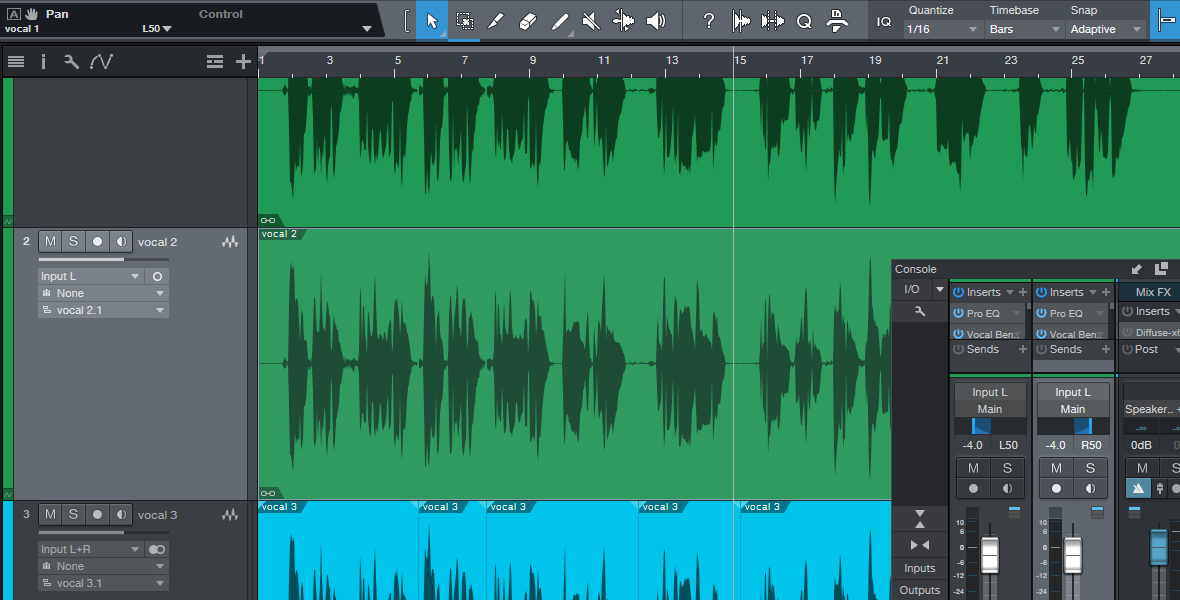
Double-tracked vocals are typically panned left and right for a wider stereo effect.
That said, definitely experiment and try out different things because adding extra vocal layers in the right places can add depth to a vocal track and make it stand out.
Doubled tracks can be panned or played together in the center, depending on what is right for the section.
You’ll often want backing vocals or additional layers to sit back compared to the main vocal. To this end, you can use gentler compression or combine that with reverb to push the backing vocals further away.
Alternatively, you can use different miking techniques to create a different, less in-your-face tonality for the additional vocal layers, such as having the vocalist sit back a bit from the mic or using off-axis miking.
Save time by using a vocal doubler plugin.
Vocal double tracking is time-consuming since you have to record multiple vocal takes that are virtually identical. This is hard, especially for less experienced vocalists.
Thankfully, vocal doubler plugins can save time while achieving similar results. A vocal doubler copies the original vocal recording and applies subtle pitch shifting to simulate vocal double-tracking.
Try a free vocal doubler like DeeDoubler by Dotec-Audio.
10. Autotune your vocals to sound pitch-perfect
Autotuned vocals have become so common that our ears are completely used to the pitch-perfect vocal sound.
The amount of autotune will largely depend on two things: your vocalist’s skill level and the music style of your project.
For most music genres, our advice is to use autotune sparingly. Always try to get the best possible vocal performance before relying on autotune to fix the pitch imperfections.
However, some music styles, like trap and modern electronic music, use autotune as a creative effect. If so, feel free to let your autotune plugin loose and crank it up to eleven.
Refer to our list of free autotune plugins to find the best pitch correction tool for your vocal mix.
Steps to mix vocals like a pro
The best way to learn how to mix vocals is through practice. You can read all the production tips and tricks for achieving studio-quality vocals, but practice makes perfect.
If you’re still struggling to craft studio-quality vocals, here’s a quick step-by-step guide to help you get started.
- Get the best possible vocal recording before adding effects to vocals.
- Use a pop filter and adjust the microphone distance and angle.
- Use vocal comping to select the best parts.
- Edit the vocal to remove unwanted noises and improve the timing.
- Autotune the vocal to improve the pitch.
- Use volume automation to level the signal.
- Use EQ and compression to improve the vocal tone and volume.
- De-ess the vocal to remove harshness.
- Use reverb and delay to add depth and dimension to your vocal.
- Use doubling and backing vocals to add thickness and harmony.
When it comes to mixing, vocals are one of the hardest elements to get right. You now have all the information you need to take your vocal mixing skills to the next level.
Vocal mixing tutorials on YouTube
A great way to learn how to mix vocals is to watch some of the tutorials available on YouTube. We highly recommend the two videos embedded below.
The first one is a vocal mixing guide by Warren Huart.
The second one is a vocal mixing tutorial by Joe Gilder.
However, we can’t emphasize the importance of practicing enough. Read our mixing guide, watch the tutorials, and fire up your DAW to start perfecting your skills.
This article was written by Steve Charlton and Tomislav Zlatic.
13 Comments
Frank
onVery helpful article, thank you!
Tomislav Zlatic
onThank you, glad you enjoyed it!
Olatunji
onThanks so much your article is very very helpful because you went straight to the points by not beating around the bush
kuro256
onThank you. Informative
Tomislav Zlatic
onThank you! :)
Ahsayn17
onThank you very much. I feel like every bedroom producer needed this. Well written is the article and full of knowledge regarding experience.
Tomislav Zlatic
onI’m glad to hear we nailed it, thank you!
Dissofiddle
onThese advice are pretty good on the technical side.
However, I think that what tutorial do not give enough emphasis on the artistic side of things : mixing is mostly choices and finding the best technic to achieve these choices. Too often, beginners focus too much on the technical aspect.
If vocals are important for instance, dark instuments with bright vocals is a choice, and bright instrument with dark vocals is another one, and both are perfectly valid.
On the other hands, you don’t always want vocals to separate from the other tracks.
These choices, dictates the moves you have to do more than anything else.
However, these advices gives great tools to achieve this
Wing Yee
onThank you Steve and Tomislav for this well written informative article. Love your “Tie” example, it’s brilliantly explained.
After comping my takes, I find using volume automation rather time consuming with occasionally unnatural results.
Instead, I render each vocal lines individually as Wav files and edit them externally with Wavosaur using VOLA2 by Sonic Anomaly.
Unlike volume automation VOLA2 compresses/expands the vocals with satisfying smooth results.
I’d start a fresh new project with these VOLA2 processed files normalized at -15 db (plenty of headroom for fx and peaks), the vocals will then be a breeze to mix.
Tomislav Zlatic
onOh, that’s a great tip! Thank you, Wing!
Production Newbie
onWhat is the best plugin for mixing?
sparella
on@Production Newbie Your DAW comes with every plugin you need to mix. Learn your DAW thoroughly. After that, you can decide where you need more control and better workflow, and get plugins to achieve those specific needs.
Adam C.
onLoved the tutorial, learned a lot about mixing. Thank you.