

If you’d like your music to sound radio-ready, you must understand the basics of mixing. Our essential guide to mixing music will help you get started.
Mixing audio involves blending recorded tracks, setting their levels, and presenting the song in the best way possible. It sounds straightforward, but how exactly do we achieve this? How does a mixing engineer achieve a perfect audio mix?
Today, we’ll describe the basics of music mixing. Each step explained here could have its own article, so treat this article as a quick start guide to outline how to start mixing songs.
Once you’ve figured out the basics, you can move on to our tutorials about mixing vocals and mixing guitars to learn how to tackle specific mix elements. If you’re looking for quick, actionable advice to improve your mixing skills, check out our mixing tips and get the perfect tonal balance in a mix.
And before you start working on your mix, here’s how to prepare a song for mixing.
What is mixing?
In simple terms, audio mixing is the process of improving the sound of a multi-track recording by blending the individual recordings together.
We do this by adjusting each audio track’s volume, frequency balance, and panning.
Mixing engineers use various music production software. A multi-channel audio mixer sets the volume levels and panning for each recording. Effects such as equalization, compression, reverb, delay, and distortion are used on each channel to fine-tune the mix.
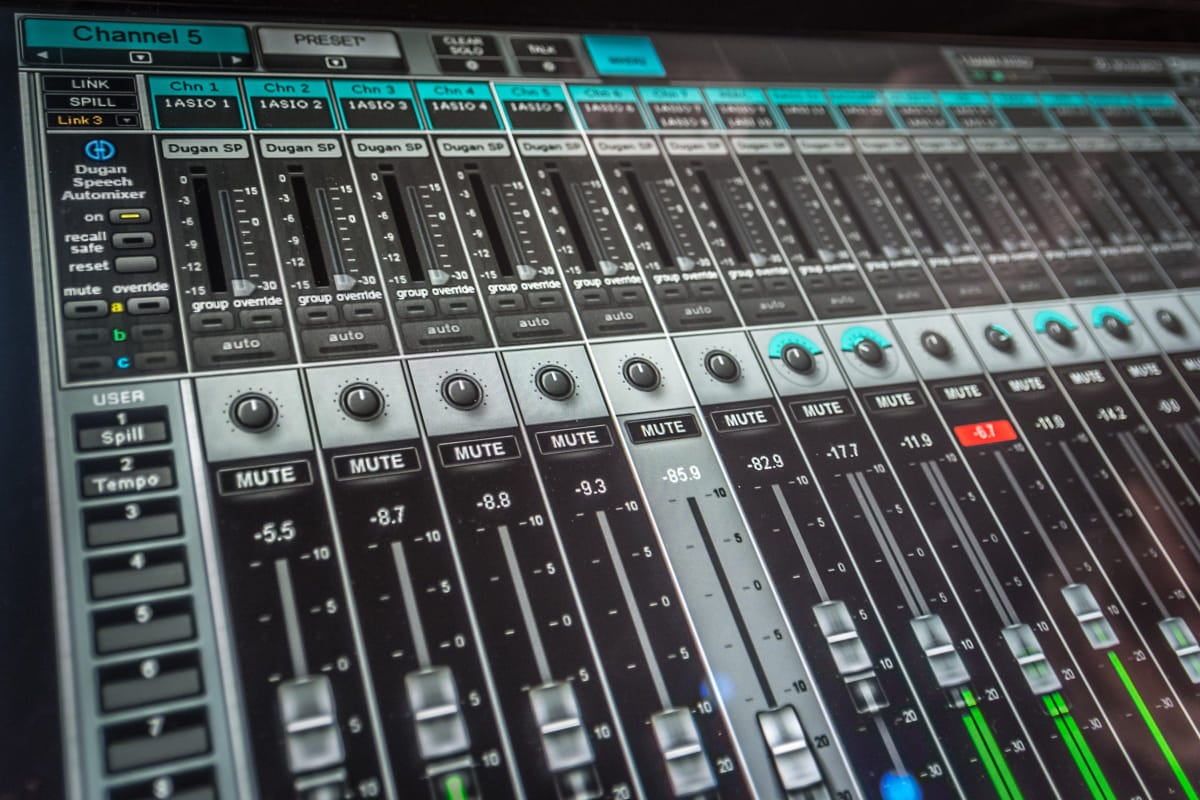
A mixing project consists of multiple audio recordings.
The mixing process can be divided into three main stages: Preparation, Balancing, and Processing:
- Preparation includes listening to and analyzing the individual recordings and how they interact.
- Balancing involves placing those sounds in the appropriate space within the stereo field and adjusting the volume and panning to create a cohesive soundscape.
- Processing includes adjusting equalization, compression, reverb, delay, etc., to achieve a pleasant-sounding mix.
Remember, you can mix your own music or hire a mixing engineer to provide a professional mix. Learning how to mix takes more time but gives you more control over the mixdown. It can also help you make better creative decisions in the composition and recording stages.
Another option is to create a rough mix. You can then outsource it to a professional mixing engineer to create the final mix.
Audio mixing and mastering
It’s important to understand that mixing and mastering are two different stages of the music production process.
Remember that mixing and mastering are two separate stages of music production.
Mixing a song turns the multitrack recording into a stereo mix ready for the mastering stage. A mastering engineer will then use various effects like compression, EQing, automation, and other tools to make the static mix sound ready for release on an analog or digital medium.
Learn more in our Mixing vs. Mastering article.
What are the steps to start mixing?
Let’s expand the three main stages of mixing into six easy-to-follow steps that you can follow for your first project:
- Choosing a DAW
- Setting up the session
- Getting the sounds
- Levels and panning
- Audio processing
- Finishing touches
Choosing a DAW
The first step is getting a digital audio workstation (DAW). Our article about free DAWs is a good starting point.
DAWs are music production programs used for audio recording and mixing. Many of them are available online, ranging from free to those costing several hundred dollars.
Some popular free DAWs include Waveform Free, Cakewalk by Bandlab, GarageBand, the 60-day trial of Reaper, and Ableton Live Lite (only free with various hardware/app purchases). Popular paid DAWs are Ableton Live, Logic Pro, Pro Tools, FL Studio, Cubase, Studio One, Reason, and Reaper.
You can mess around on some free ones and find what you like. Several paid DAWs include trial or free versions of their main product (such as Pro Tools First, Reaper, Ableton Live Lite, and Studio One Prime).
Every mix starts in the DAW.
If your budget is minimal, then the $60 personal license of Reaper is a good option.
All the paid versions of pro-DAWs basically have the same core features, so don’t stress too much about which one to choose. Most modern DAWs can handle any type of project, including live instrument mixes, MIDI, and voice work.
Start mixing songs: Setting up the session
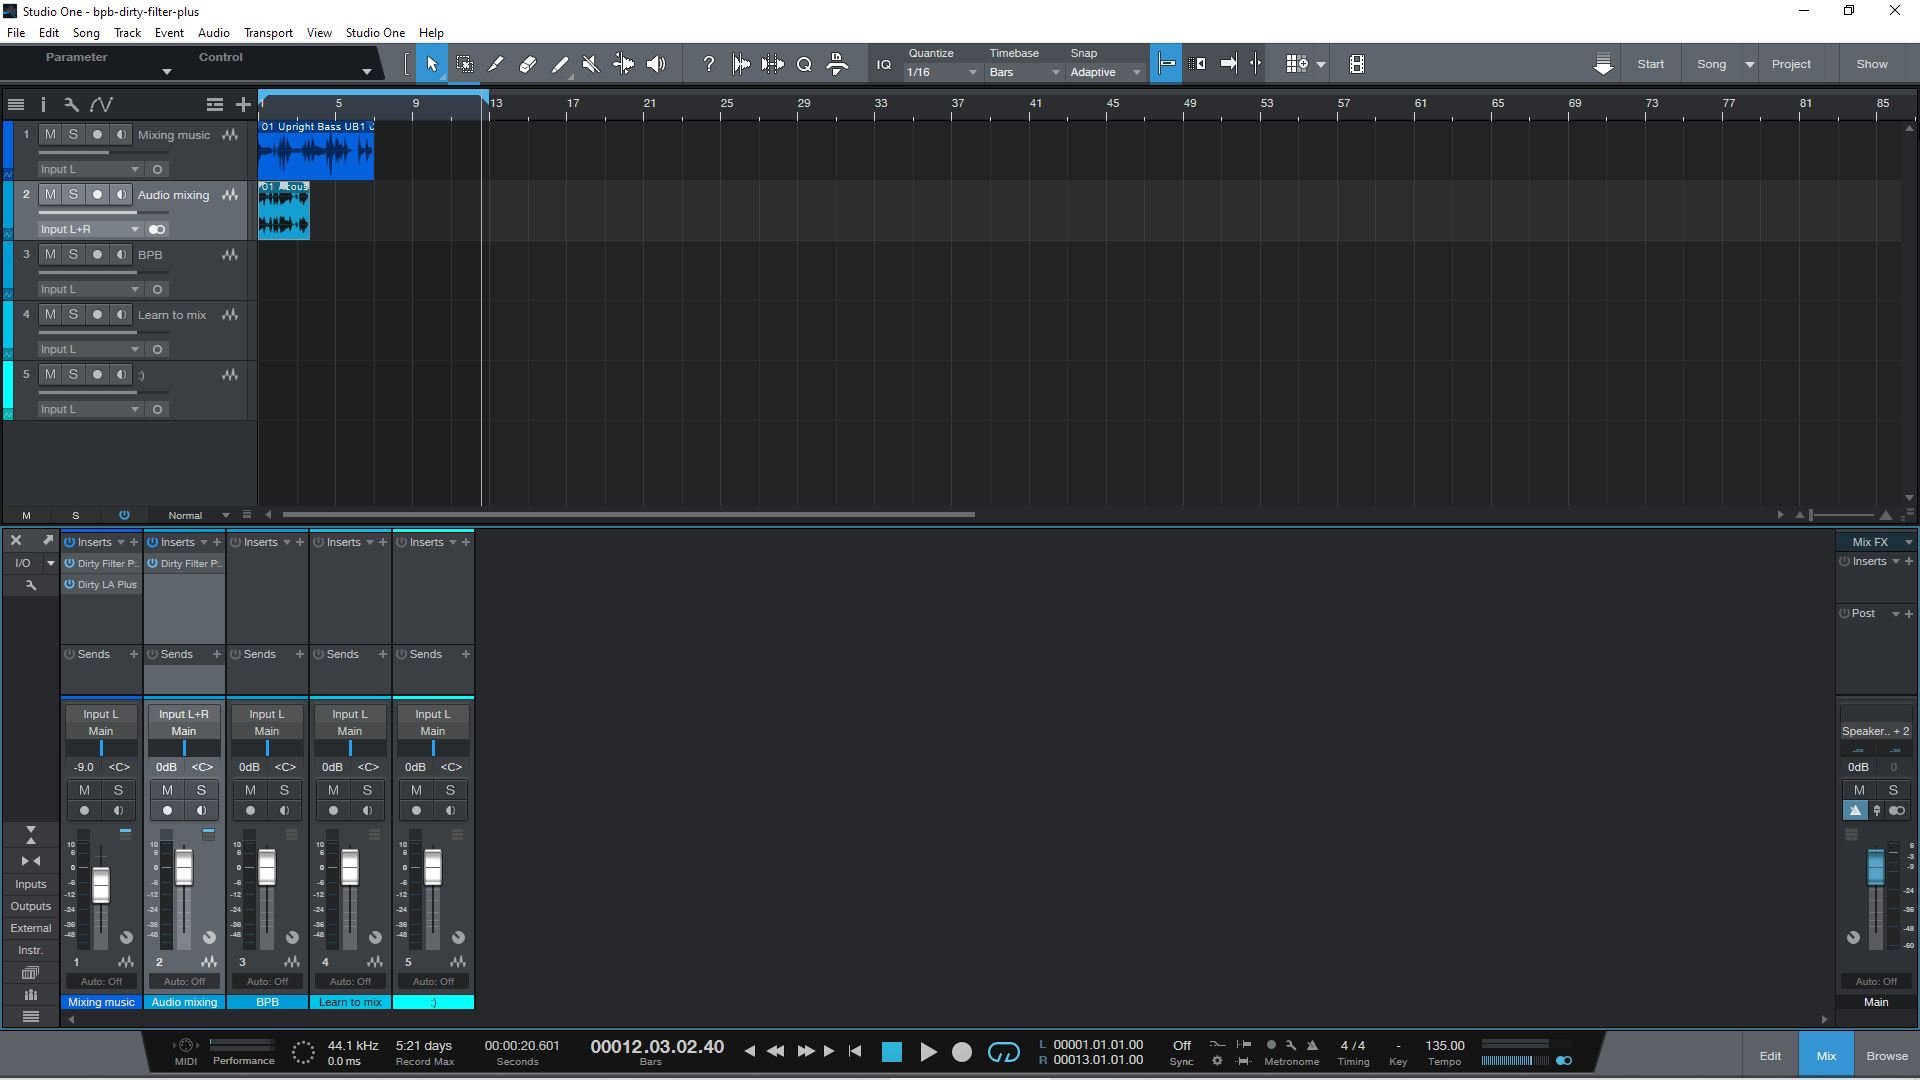
The first step of mixing songs is to set up the session. You can do this manually or use the template from the DAW. You can also create a custom template once you know what you typically need.
Remember to name the tracks. Mixing sessions quickly get out of hand, and you’ll be picking about the DAW like a ravenous chicken looking for a lost track in no time if the instruments aren’t labeled.
Set up groups of related tracks in a bus. A bus is a channel that groups multiple audio tracks, enabling you to change the level or processing on all tracks simultaneously, saving time.
The most common group for a bus would be the drum tracks, but it’s also applicable to anything else that uses the same processing (for example, the lead parts or vocal parts).
Taking a minute to color code groups of tracks also saves time. You could make all the drum tracks one color, the lead guitar harmony tracks another color, etc. This will help you navigate the session faster and help you visualize the various buses.
Learning how to mix is a marathon, not a sprint.
Remember, learning audio mixing is a marathon, not a sprint. Take it slow and be methodical. Your first results won’t be great, and that’s perfectly fine. But mixing music becomes much easier after some time and a lot of practice.
Get the sounds right at the source
You want to get your basic sounds right during the recording process and then do light touch changes in the DAW to bring it all together. If the basic sounds are bad, there’s only so much you can do to polish a turd in the mixing phase.
In a way, mixing audio is like cooking. You can’t possibly make a great-tasting dish with low-quality ingredients. A good-sounding audio mix comes from good recordings (or samples).
You’ll ultimately save time redoing a take and getting it right rather than forging ahead with something you know sounds terrible and trying to fix it later.

A well-recorded and edited song is much easier to mix.
Pay special attention to the settings on your gear, where the microphones are located, the performance itself, etc. Concentrate on the basics. Tune your instruments, rehearse your vocals, and use good-quality microphone cables.
Don’t waste time trying to EQ something in-depth during tracking; get a good bare-bones sound you can improve later.
Mixing audio: Levels and panning
Once your mixing session is ready, it’s time to set levels and pan them. Setting each audio track’s correct volume and stereo position is the first stage of getting a good mix.
We usually set the pans first, then put rough levels on everything so the parts sound about right.
Panning determines where the sounds are placed in the left and right channels. Stereo mixing is a broad topic. Simply put, you want to position things so that each mix element gets its own space.
In a typical song, you might have the following parts in the center: Vocals, bass, snare, and kick.
Then, pan the other drums and cymbals to represent where they sit on a drum kit (hi-hat to the left, for example).
The first step when mixing music is setting the rough levels and panning.
Then, put the melody or other rhythmic elements at some point on the left or right to give the center parts some space. For example, if you have an instrumental harmony, one part could be panned to the left and the other to the right.
Remember, mixing music starts with setting each mix element’s rough levels and panning. Returning to our cooking analogy, levels and panning are the pizza dough. Everything else is the toppings.
Audio processing
After the pans and rough levels are set, proceed to process the audio. This is where the mixing stage gets fun. A mix engineer will typically enhance the individual elements by applying EQ, compression, and different types of reverb, among other creative mixing tools.
The goal is to make different instruments sound as good as possible in the context of the whole mix. You will apply volume automation and effects to all mix elements, including the lead vocals, snare drum, rhythm section, and every other sound source.
As mentioned, panning exists to give the part space in the stereo field. The purpose of EQs is to provide the parts space in the frequency field. So you’ll use it to carve out a space for the low-end instruments (bass, kick drum, etc.) and the mid and high-end instruments (vocals, melody, lead parts, cymbals, snare, etc.).
You’ll want to use high-pass and low-pass filters to cut the unnecessary frequency areas out of some tracks and then do EQ tweaks to shape the remaining elements.
A high-pass filter can remove unwanted low frequencies like hum and noise. It’s also a good idea to remove unnecessary higher frequencies on each channel with a gentle shelving filter.
Compression controls the dynamics of the tracks in your mix. Compression limits the dynamic range of a part by making the loud parts softer and the soft parts louder. You can use this to tame overly dynamic parts and help parts sit more prominently in the mix.
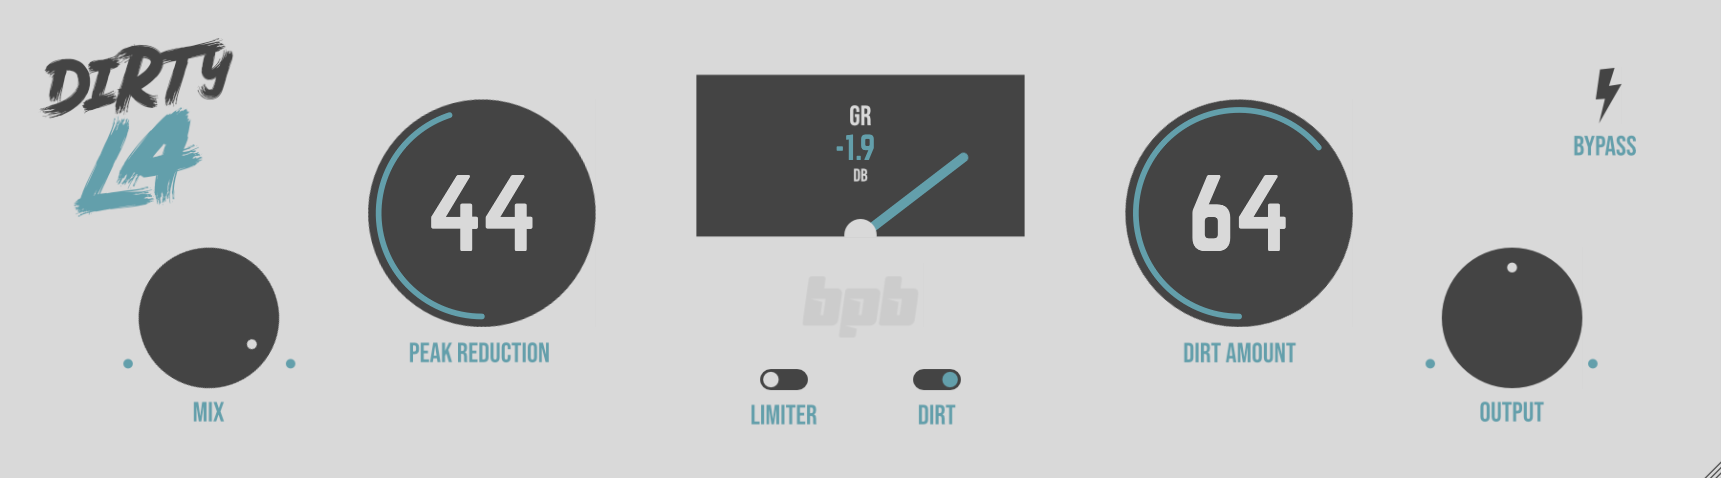
BPB Dirty LA is a free compressor VST plugin.
Don’t overdo it, though. If compression is overused, it makes the mix harsh and unpleasant to listen to. Think of a pizza that stayed in the oven for too long. Not very tasty.
Read our compressor mixing tips for additional guidance.
Reverb is the reflection of sound in a space. You can use this as a ‘color’ effect or give the parts a spatial dimension as you’d hear them in a real room.
Compression ‘sharpens’ a sound and brings it forward in a mix, while reverb makes a sound defused and distant.
Using these elements along with EQ allows you to blend the parts harmoniously, giving the mix power and depth.
The finishing touches
Once you’ve leveled and processed the sounds, the final step to mixing music is to export the track for mastering. Use the meters/plugins to check that the levels and loudness are appropriate for both these steps.
You can also use a reference track of a song you like the mix of dropped into the DAW (don’t use an external program to play the track) to see if you’re on the right track in the big picture. Once the mix is finished, you can master it using mastering software, an online mastering service, or send it away to a pro.
Basics of mixing – how do you mix properly?
Now that you have learned the step-by-step process for mixing music, you are ready to practice. However, there are several beginner mistakes you should avoid so that you improve your skillset more efficiently.
Here are four beginner mistakes you should avoid while mixing:
- Not using proper monitoring equipment
- Not utilizing a reference mix
- Mixing at loud volumes
- Not taking breaks to let your ears rest
Remember, listening is critical when mixing. But to listen properly, you must allow your ears to do their job correctly.
So, let’s explore the techniques that will help you supercharge your mixing skills.
Use proper monitoring (studio monitors and headphones)
Using low-quality speakers or headphones while mixing is like editing a photo on a cracked, low-resolution screen. You won’t be able to get a good result.
A pair of studio monitors or studio-quality headphones will enable you to hear the audio in full detail and allow you to identify any problems. Issues like frequency masking, clipping, and loudness inconsistencies are auditory phenomenons you won’t be able to notice on low-quality monitoring equipment.
You don’t need a big budget for your first mixing setup. A laptop running a free or paid DAW and a pair of budget studio headphones are enough to start. If you have more space, you should consider investing in budget studio monitors since they provide a better stereo image.
Use a reference mix
Now that you have proper monitor equipment, you must get some listening perspective. The easiest way to ensure your mix sounds good is to consistently compare it to a reference mix.
You will feel lost in a sea of sound waves and frequencies when you first start mixing. A reference mix will be the compass that will always point you in the right direction.
Choosing a reference track is easy. It should be a song you’re familiar with and similar to the track you’re working on. So, if you’re working on a pop mix, find a pop song that sounds good to you and use it as a reference.
Load the reference track on a channel in your DAW, and make it a routine to compare your mix to it. This will recalibrate your ears and help you analyze your mix correctly.
Keep the volume down
Let’s return to our photography reference. Blasting your studio monitors at full volume is like looking at a screen set to full brightness. Your ears will get tired, and ear fatigue will lead to poor mixing decisions.
And that’s just scratching the surface.
You’d also want to keep the noise down for other reasons, such as human hearing’s tendency to perceive frequencies differently at different volumes. Keeping your studio monitors quiet will give you a more realistic idea of how your mix sounds.

Most beginner mixes are made in rooms that aren’t acoustically treated.
Another thing to keep in mind is room acoustics. As a beginner, you’re probably mixing in a room that isn’t acoustically treated, and high volumes will exaggerate the room’s resonant frequencies and reflections.
Lastly, you want to keep your ears safe. Listening at lower volumes will help prevent ear damage. You never know when an unstable plugin or a lousy cable might cause a loud volume spike.
Remember to take a break
High volume isn’t the only cause of ear fatigue. Your ears will eventually tire even if you’re mixing at low volume. To prevent this, remember to take breaks consistently during the mixing session.
Stop the playback in your DAW, stand up, stretch, and return to the session after a few minutes with fresh ears.
How to include compression, EQ, and reverb in your mixing process
Mixing typically starts by adjusting the volume faders and panning knobs on the mixer. Once you’ve used these basic tools to get a good balance, the next stage is using audio effects like EQ, compressors, noise gates, and reverb in the signal path to add definition, focus, and depth to individual tracks.
A compressor reduces the dynamic range of the signal. It can highlight the finer details in a recording or add “glue” to a complex signal, such as a multitrack drum.
Be careful, though. Too much compression can make the mix sound dull and lifeless. A compressor is an essential tool for getting great mixes, but mastering compression takes a lot of time.
An EQ changes the frequency spectrum of the track. You can remove unwanted frequencies or subtly boost a certain frequency range.
Reverb adds depth and dimension to your mix. There’s no right or wrong way to use reverb, but you’ll typically want to use more reverb on background elements. Read our reverb mixing tips to learn how to add space to your mix.
Every digital audio workstation includes effects, but you should consider expanding your toolkit with third-party plugins. We have already covered the best free equalizers, compressors, and reverbs to help you get started.
Mix in context
Here’s an important piece of advice: Use these effects in the context of the entire song, just like you did when adjusting the volume faders for the right mix.
Treating every sound like a piece of a bigger puzzle is essential to get a coherent mix. So, try to solo individual instruments as rarely as possible. What you want to learn is to sculpt the individual tracks while listening to the entire mix.
You’ll want to emphasize some mix elements to get the listener’s attention while maintaining the sonic balance. For example, you’ll want to draw attention to the vocal tracks but not so that they overpower the whole band.
The best way to do this is while listening to the full mix instead of soloing a particular instrument.
Input levels, panning, and gain staging
Generally speaking, gain staging is far less important now than in the analog days. However, you should still consider using similar input levels across all channels to simplify the mixing process.
A good rule of thumb is to set all audio channels to a similar peak volume before using panning and channel faders to set the rough mix. This will make it easier to visualize the volume of all tracks by quickly looking at your mixer’s volume faders.
If a track is too loud or quiet, a quick glance at the mixer will help you find the correct fader.
The #1 music production beginner mistake: untamed low end
The most common mistake of beginner mixes is too much low end. This happens because of our natural tendency to enjoy bass frequencies and the fact that modern music focuses on bass-heavy sounds.
To avoid making this mistake, reserve the bass of the frequency spectrum for low-end instruments like the bass guitar, synth bass, and kick drum.
Apply a gentle low-frequency roll-off to other elements, such as the vocals, guitars, and melody instruments.
Also, if you’re mixing in an untreated room or with entry-level monitoring equipment, don’t worry about perfecting the loudness of your mix. It will be adjusted to the desired level when the song gets mastered.
Mixing takes practice
Mixing is easy to learn but hard to master. We hope our mixing guide will help you improve your production skills faster, but you’ll need to put in the effort first.
The one and only secret is that learning to mix takes practice, no matter how many mixing tutorials you read and how much advice you get.
Choose a DAW, load it up with VST plugins, record some music, and work on your mixing skills daily. Listen to your mixes on different studio monitors and seek feedback from other producers. Analyze the quality of your mix and try to make the next one better.
Happy mixing!
Music Mixing FAQ
Here are answers to some common questions about mixing music in a home studio.
What are the basic elements of a well-balanced mix?
A well-balanced mix consists of clean and clearly audible vocals, defined instruments, appropriate volume levels across the mix, a spacious stereo field, and controlled dynamics.
Ensuring that each element is given its own space in the frequency spectrum and stereo field will result in a mix that sounds pleasing to the ears and translates well across different listening devices and rooms.
What are some common tools used in mixing music?
The most common tools for mixing music are a multi-channel audio mixer and effects like equalizers, compressors, limiters, reverb, and delay.
EQs help balance the frequency content of individual mix tracks, while compressors and limiters control the dynamics of a mix. Reverb and delay will create a sense of depth and space in the mix, simulating the characteristics of real-life rooms and spaces. Panning and volume adjustments are also important for achieving a balanced mix.
How do I ensure that my mix sounds good on different speakers?
To ensure your mix translates well across different speakers, it’s important to test it on various devices, such as studio monitors, headphones, earbuds, car speakers, and home stereo systems.
Use reference tracks (professionally mixed songs in a similar genre) as a benchmark for your mix’s overall balance and tonality. This will help you identify any potential issues and make necessary adjustments.
What is the role of mastering in the music production process, and how does it differ from mixing?
Mastering is the final stage of music production, where the mixed song is processed to achieve a release-ready sound.
It involves adjusting the overall volume, loudness, equalization, and dynamics of the mix to ensure consistency across tracks on an album and compatibility with different playback systems.
Mixing, however, focuses on balancing the individual element, setting the appropriate volume levels and frequency balance to create a well-defined and harmonious mix.
This article was written by Steve Charlton and Tomislav Zlatic.
14 Comments
John Egan
onAfter spending hundreds of dollars on Cubase, then Sonar, and then Magix, I stumbled upon Reaper… And that is the DAW I’ve used ever since. It is as complex as you need, has an amazing following and online support, and is more full-featured than the others.
The trial never expires… If you use the trial version, it is no different than the paid version, but it opens with a nag screen… That’s it. Everybody just buys it after trying it because it’s dirt cheap at $60, but I have come across poor student types who just put up with the nag screen.
Tomislav Zlatic
onHi John, thanks for your comment. The article is correct. The Reaper trial expires after 60 days. According to the developer, it’s a “fully functional 60-day evaluation.” It’s correct that users can still access the software by closing the nag screen, but despite that, the trial period officially expires after 60 days.
I completely agree that Reaper is an excellent DAW, with a fantastic community and support. Again, thanks for your suggestions.
Michael Jackson
onI agree. Been using REAPER since version 4.
Peter Dillon-Parkin
onThe argument about whether Reaper expires or not seems pretty silly, but it’s a great DAW. I use Studio One Pro, but I still update my (paid for) copy of Reaper because it is so useful. There are things you can do easily in Reaper that are a faff elsewhere. If Presonus disappeared, I’d go back to Reaper full time. I’ve worked with many DAWs and would rate Reaper near the top. If students can’t afford it, they should move to Bandlab’s. Cakewalk, which is free.
Tomislav Zlatic
onSame here. Studio One Pro as the primary DAW, but I use Reaper, too.
Adam
onLet’s face the truth. Reaper is on any system and very soon it will became main studio daw everywhere. Even if someone denies that he/she uses Reaper it is installed on their system just to check what can be done with it. I use ableton and studio one on daily basis but for some tasks like audio to midi and midi creation more and more I catch myself using Reaper instead mentioned two.
CaveDweller
onI used it years ago but I haven’t loaded it on my past 4 DAWs and I dont envision ever using it again. It just doesn’t compete with S1s workflow.
Pillboy
onlol comment aged like milk
Wing Yee
onDAWs, they’re all kind-a-like bathtubs because regardless of color, shape, or size they all go down the same drain. It’s what and how we put in them that matters.
Try as many DAWs as you can (both free and paid) and decide which one works best for you.
In my case REAPER is number 1 for me. Although it doesn’t come with any instruments but as an artist I would much prefer to start a project on a blank piece of paper instead of bombarded with many colors I have to remove before I can get started..
Yara
onI adore this blog. Been finfind superb free stuff and and I just spent over an hour taking notes on this post. That’s an awesome guide¹ Now going to the next to keep learning!
Tomislav Zlatic
onHey Yara, glad to hear that you liked the mixing guide! We have more tutorials coming soon.
Lekan
onI like the mixing guide it what I have been looking for
Thanks guys
Tomislav Zlatic
onThank you, Lekan!
Jessie Mae
onAbleton is a solid choice